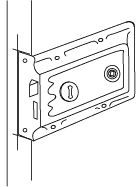
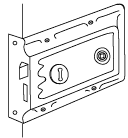
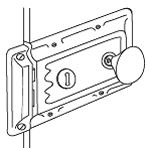
Fitting a rim lock
Fitting a rim lock to a door is quite straightforward but does need care in the measurement and cutting for a neat finish.
Before fitting a rim lock, remember that it does not provide as much security as a mortice lock - being mounted on the side of the door, it much easier to burst through a door fitted with a rim lock.
Rim locks are usually fitted to relatively thin doors which are not thick enough to accept a mortice lock.
Cutting the door for a Rim Lock
 Start
by deciding on the position on the door for the rim lock; ideally all the door handles in a property should be at the same height
from the floor, so check the height of other locks in the property to give you a guide.
Place the rim lock against the side of the door with the front plate against the edge - mark on the edge of the door around the endplate of the lock.
Use a sharp chisel to mark along the lines for the endplate of the lock to establish the edges - by cutting the surface of the wood, this should prevent any wood lifting from the surface beyond the lines required.
Use a sharp chisel to cut out the edge of the door to a depth equal to the thickness of the endplate so that the front of the endplate will be flush with the edge of the door.
Place the lock on the side of the door and position the endplate into the cut-out - now mark the position for the door handle bar and the keyhole on the side of the door.
Drill the holes for the handle bar and keyhole in the door - the hole for the handle spindle should be at least as big as the spindle boss on the backplate of the lock - for the keyhole, drill a hole at the top and cut out the rest of the shape using a thin pad saw.
 Position
the rim lock on the door with the endplate in the door edge recess and with the handle spindle and key hole lined up with the holes
in through the door. Secure the lock to the door using screws - heavy duty rim locks often have four around the main body of the
lock (which go into the side of the door) and possibly two countersunk screws on the endplate (to go into the edge of the door).
Light duty rim locks often have only three or four screws around the main body.
Handles and key shields
 A door
handle escutcheon and key shield should be fitted on the reverse side of the door. Position these by lining them up using the handle
spindle through the lock and the key inserted into the lock as guides.
The door handles used need to be of a bar type with small screws in the 'skirt' of each handle - the bar having holes in it for the screws to locate in. Check the length of the handle bar as it may need to be shorten so that both handles from sitting correctly - this will depend upon the thickness of the door.
Fitting the door frame staple
 Close
the door and mark on the door frame the position of the top and bottom of the rim lock body.
The 'staple' (which holds the catch and bolt of the lock when the door is closed) may have an endplate (to match the one on the lock) or may just be secured to the edge of the door frame. If there is an endplate, this will need to be recessed in the frame in a similar manner as for the lock endplate - i.e. draw around the endplate onto the door jamb, use a sharp chisel to cut the surface of the wood and chisel out the recess to suit the thickness of the endplate.
With the endplate recess cut if required, position the staple on the door frame and mark around it. The architrave on the side of the door will probably need to be cut away so that the staple will fit flat so that it is in line with the face of the door.
Once the cut-out in the architrave has been completed; extend the lock bolt (by turning the key in the lock), close the door and place the staple over the lock bolt - check that the top and bottom of the staple line up with the top and bottom of the body of the lock and then secure the staple to the door frame using screws - heavy duty locks often have two countersunk screws into the door jamb (like the lock) as well as two or three screws to secure the staple to the edge of the door frame.
